
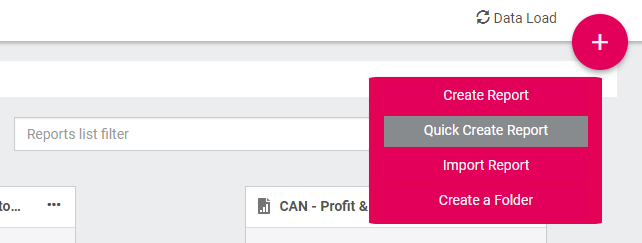
2. A dialogue will appear where you can enter a name for your new report and select the set of predefined columns and rows you want to use. You may also have additional options like entering a description or selecting a folder for it to be placed in.
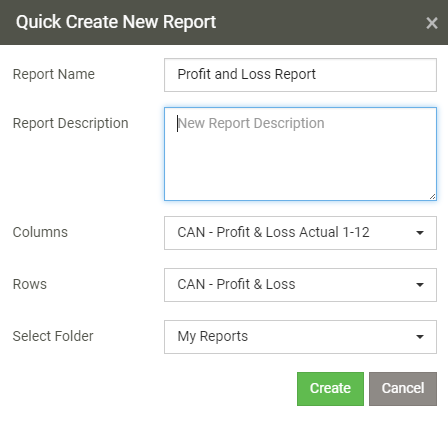
3. Once you select Create, your report will be added to the specified folder and that's all you need to do. 4. You can now run the report and will see the layout produced as per the columns and rows that you specified.
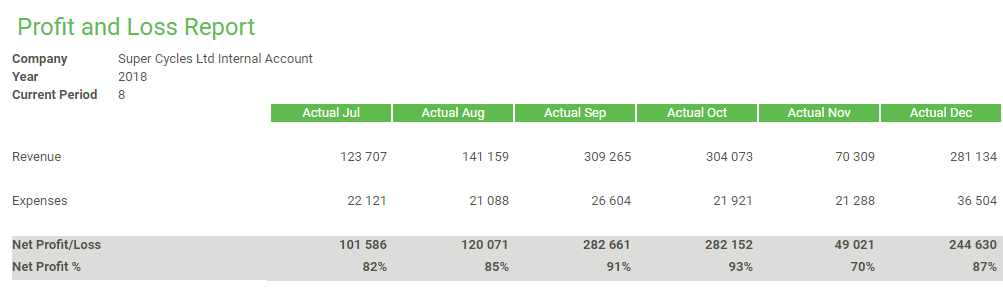
Now if you would like to make any modifications to it, you can open it up in the Design Pane. You can also save any custom column or row sets that you create in the Design Pane for future use. For more information on this take a look here. Lastly, take note that depending on your Sage product, your system may differ slightly to the images shown here, however the same principles apply.