Hello readers,
Today we are going to cover a topic that is going to be an important and probably complicated for some of you. With the release of Version 12 Patch 24; there is a major change with Mongo DB and their future released versions.
As of MongoDB v4.2, Mongo (the company) has decided to deprecate the MMAPv1 storage engine. What this means is that MongoDB can only utilize one other storage engine, Wiredtiger. This affects the way information is stored and how to store it.
So, you might be asking yourself, “Why would I care?” Well, that’s a good question. How does this affect Sage X3 users? The affect is that we (as in Sage X3) use the MMAPv1 storage engine. So essentially, if someone wanted to update Mongo DB for Sage X3 and they are on V9, 11, or 12, they would have to export the Mongo DB data out, upgrade Mongo DB and import the data back in.
This process can be very complicated. Simply just updating Mongo DB from 4.0 to 4.2 would render the dataset unusable. This is because the database would still be in a MMAPv1 format and not be accessible by the Wiredtiger engine; it is not in a Wiredtiger format. Updating mongo does not do any data conversions or updates to the collections or database instances. This is why someone would have to dump and restore the database. Re-importing the data, forces it through the Wiredtiger storage engine and converts it to match the new structure. With all of that said, I am going to demonstrate how you would go about upgrading MongoDB 4.0 to 4.2.
Before we begin, we must make sure we meet the minimum requirements for the installer. I just so happen to have them right here:
Prerequisites
For each Sage X3 release, the minimum Syracuse upgrades compatible with MongoDB 4.2 are the following:
|
Product version |
Minimum Sage X3 Syracuse Server version |
|
V8 and lower |
Not Applicable |
|
UP9 |
SYR 9.19.0 |
|
V11 |
SYR 11.19.0 |
|
V12 |
SYR 12.5.0 |
So, like every upgrade, we need to backup all our stuff before starting the upgrade. This ensures that if we royally mess up, we can at least put it back to how it was. If the machines are Virtual Machines, making a snapshot is probably best. Once all of that is in place, we are going to start with shutting down the Syracuse services. There is an Agent service you want to turn off:
Safe X3 Agent Syracuse Server NODE0

Note that depending on the version of Sage X3, the agent service might have a different name than mine. My machine is Version 12 Patch 23.
Our next step will be to extract the database from MongoDB. In mongo terms, this is called mongodump. Mongodump is the function tool used to export/backup datasets from MongoDB. We also have a very nice Knowledgebase article (KB) about cloning/moving MongoDB datasets from one server to another. This same KB can be used to accomplish exactly what we are about to do. You can find a link to it HERE.
On this KB we are going to only look at the ADDITIONAL INFORMATION section of the KB. You can ignore the rest of it because we don’t care about it. The KB mostly refers to exporting, not data extracting. If you are running this for Version 12 patch 24, then take a look at the install guide with the patch. It should have a link for “How to upgrade to MongoDB 4.2” instructions… or you can look HERE.
Note: these steps I am about to perform are based on my specific testing machine. The mongodump commands I am going to show you could be different for your version / platform / environment.
Here we go…
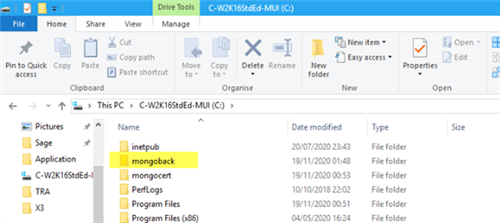
First thing we do is make a folder directory for the backup data to go. I am simply creating a folder on the C drive. “C:\mongoback” like so:
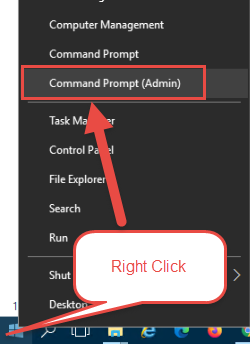
Next, we need to open Command Prompt. (CMD) All the backing up is done through the CMD. You must run CMD as Administrator.
Next, you want to Change Directory (cd) to the location where MongoDB ‘s bin folder is located.
My example, for my machine is “D:\Sage\Safex3\MongoDB\mongodb-win32-x86_64-2008plus-ssl-4.0.18\bin”
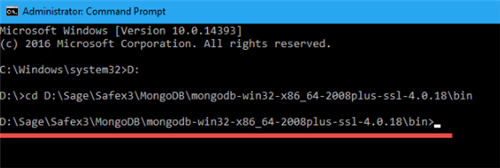
In the bin directory is where you will find all the executables needed to import, export, dump, and restore. For our case, we will be using mongodump (before install) then mongorestore (after install).
This is the part where its going to be complicated. If your mongodb uses ssl or any sort of authentication, you will have to include that in your string command when dumping the database or it will not connect or dump properly. Unfortunately, my machine does use SSL so I have to include that within my string.
mongodump.exe --host X3ERPV12VM --port 27017 --ssl --sslPEMKeyFile "D:\Sage\Safex3\MongoDB\certs\client.pem" --sslPEMKeyPassword " " --sslCAFile "D:\Sage\Safex3\MongoDB\certs\ca.cacrt" --db syracuse --out C:\mongoback
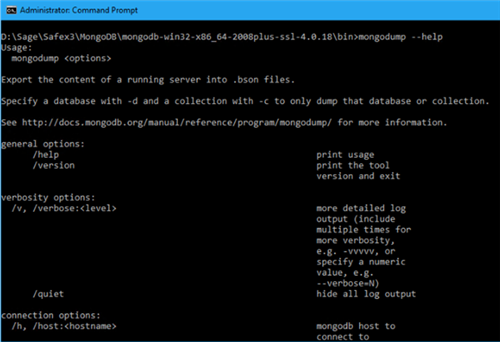
I went ahead and color coded it to help with the explanation. The BLUE part is the mongodump.exe which is the executable program for dumping the database. The PURPLE part is server or host where mongo is and the port you connect to mongo on. Note that the dashes before host and port is actually a double dash (like Mario Kart). The ORANGE section is all for SSL.When using SSL to connect to mongo, you must list out where the cert files are, so it knows where to check. The GREEN part is the name of the database in mongo. It will always be syracuse (lowercase). And in the last part, RED is the location where you want the executable program to put the extracted dataset files. All of this information can be found on MongoDB website when you look for mongodump. You can also get the syntax by typing in mongodump --help like this.
If you are not using SSL certs then you can cut out all the SSL stuff. It would look more like this:
mongodump.exe --host X3ERPV12VM --port 27017 --db syracuse --out C:\mongoback
instead of this:
mongodump.exe --host X3ERPV12VM --port 27017 --ssl --sslPEMKeyFile "D:\Sage\Safex3\MongoDB\certs\client.pem" --sslPEMKeyPassword " " --sslCAFile "D:\Sage\Safex3\MongoDB\certs\ca.cacrt" --db syracuse --out C:\mongoback
Anyways, run the mongodump command to extract your dataset. If you type anything in incorrectly, then you will not get any extraction data. Note, that CMD is not case sensitive but mongo is. Pay attention to the case on your typing. It is best to type it out in a notepad before hand, so you can copy/paste to CMD.
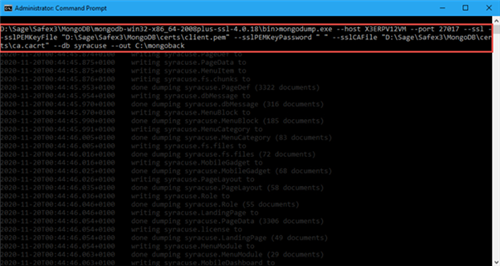
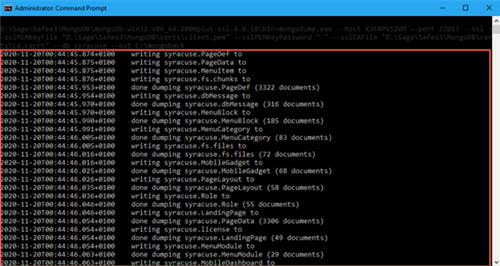
If done right, you should start seeing in CMD the collections being extracted out to the directory noted in the syntax.
Then, we want to go and check to make sure it actually exported it out. As I showed earlier above, I created a specific directory for the dump to extract to. C:\mongoback and here it is:
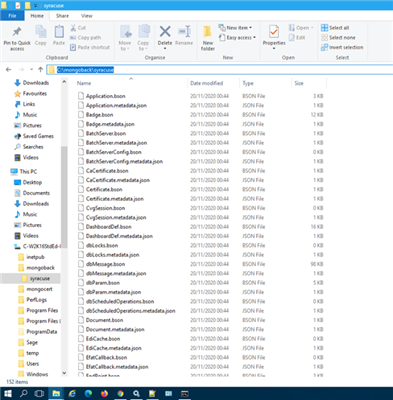
It creates the extracted collections in a folder with the same name as the database. In my case, the data is actually under C:\mongoback\syracuse.
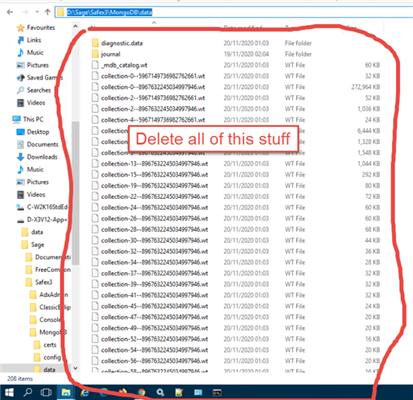
The last step before installing mongo to 4.2 is to delete all the files in the data folder. We are doing this because, we are going to restore the data after the install. The current data will be rendered unusable anyways. We are first going to stop the MongoDB service. You can find the services in the same place we went to stop the Syracuse server earlier. Again, the name of the actual service may vary depending on the version of Sage X3 you are using.
Safe X3 MongoDB MONGO01

After you stop that service, we are now free to navigate to the MongoDB data folder and delete the stuff inside. My example location is like this: D:\Sage\Safex3\MongoDB\data
We just clear it out:
before
After:
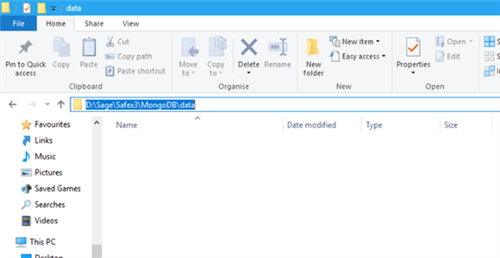
Now that we have backed up mongo and cleared out the data folder, it is time to upgrade mongo to 4.2. To do that, we are going to run the installer which you can download from our Sage Knowledgebase site. You will want to search for KBID# 107924. We will be using the Modify installation option from within the installer application.
I am not going to go into the details of the actual installer steps, but if you would like a step-by-step document you can review that documentation HERE. I am only going to discuss steps in the process that I think are important and will not be screenshotting 20 something steps.
Here is the first Step that I think is important. Make sure you are modifying the existing install and not installing a new instance of MongoDB (unless you really want two installs of Mongo)
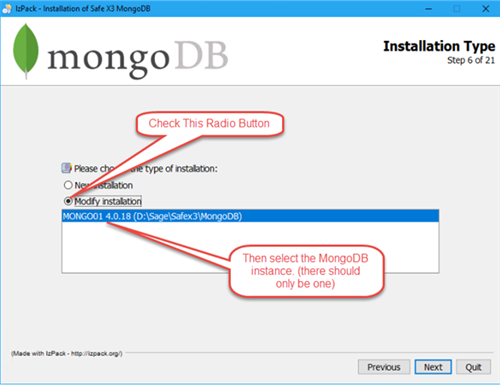
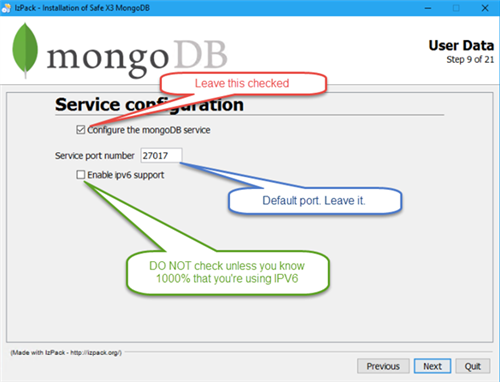
On this next step, make sure you take all the defaults unless you specifically know that the ports, services, and IPV were changed. If you have no clue what I am talking about, then do not touch any of these options.
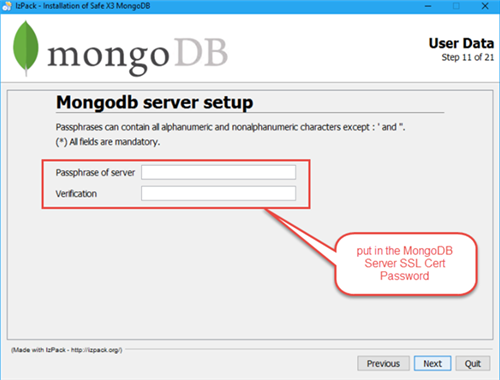
The next set of steps are for SSL. If you do have SSL configured, you will need the server-side password for the cert when it asks for it. If you do not use SSL, then you can skip the next two screenshotted steps
SSL step
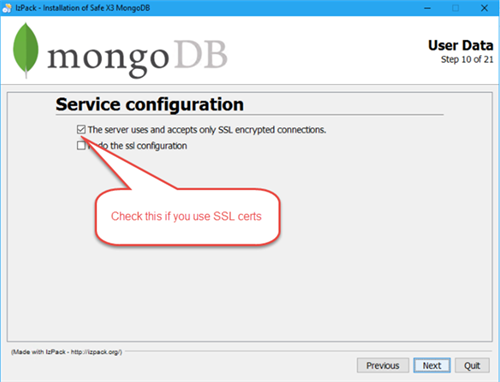
Also SSL step
Next, you can just let it install
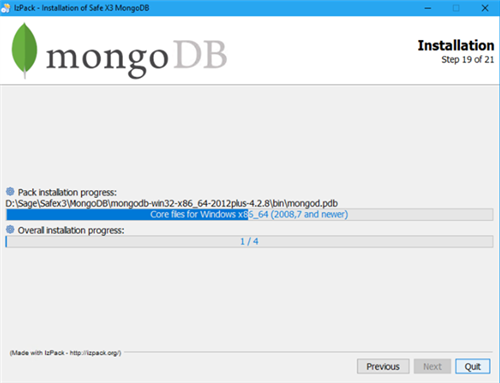
Once it is finished, confirm the install went successfully by checking the control panel and making sure the installer for MongoDB says 4.2.8. If it did not install correctly or failed to install, try re-running the installer again or restore from backup and then try again

Now that MongoDB 4.2 is installed, we need to restore the dataset we extracted earlier. To do this, we are going to use the same methodology as the mongodump. I will do a quick breakdown again like I did for the mongodump.
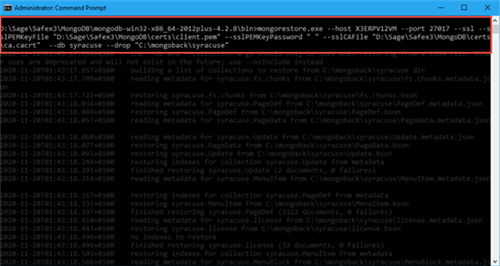
mongorestore.exe --host X3ERPV12VM --port 27017 --ssl --sslPEMKeyFile "D:\Sage\Safex3\MongoDB\certs\client.pem" --sslPEMKeyPassword " " --sslCAFile "D:\Sage\Safex3\MongoDB\certs\ca.cacrt" --db syracuse --drop "C:\mongoback\syracuse"
The BLUE part is the mongorestore.exe which is the executable program for restoring the data back to the instance. The PURPLE part is server or host where mongo is and the port you connect to mongo on. The ORANGE section is all for SSL. The GREEN part is the name of the database in mongo. It will always be syracuse (lowercase). And for the last part, RED is the location where the extracted dataset is that needs to be imported back into the system. You can find more information on mongorestore.exe function by going the link HERE.
Once you figure out your command syntax, go ahead and run it just like we did for the mongodump executable earlier. It should look similar to mine:
Note: If you are not using SSL certs, then you can cut out all the SSL stuff. It would look more like this:
mongorestore.exe --host X3ERPV12VM --port 27017 --db syracuse --drop "C:\mongoback\syracuse"
instead of this:
mongorestore.exe --host X3ERPV12VM --port 27017 --ssl --sslPEMKeyFile "D:\Sage\Safex3\MongoDB\certs\client.pem" --sslPEMKeyPassword " " --sslCAFile "D:\Sage\Safex3\MongoDB\certs\ca.cacrt" --db syracuse --drop "C:\mongoback\syracuse"
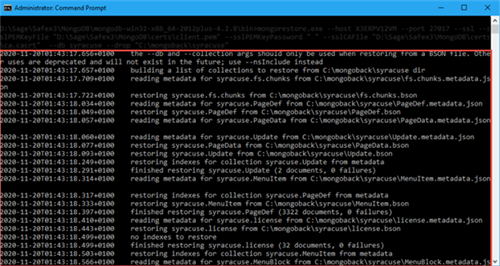
Go ahead and run the mongorestore. If done correctly it should start importing the collections back into the mongo instance.
My command:
Data being imported back into the system:
***

Once it finishes, we will want to turn back on all the services we have turned off. The MongoDB service should have auto started as it is programmed to do so when you finish installing. You will, however, need to turn on the Syracuse service that we previously turned off. If everything went as expected, you should be able to log in and have all your stuff load.
I hope this has been enlightening to you all and that it helps when the time comes to update MongoDB to 4.2.
Good Luck Readers!
P.S.
I would like to clarify, before anyone starts posting crazy MongoDB questions, I am no expert in MongoDB, and a lot of this was trial and error testing. If you want professional expertise on MongoDB, I would highly suggest talking with a certified MongoDB professional (I don’t have any recommendations) as it is a Database application and should be treated as such. I also take no credit for the documentation as majority of it came from MongoDB online documentation, as noted by the links throughout the blog post. You can also access all of MongoDB’s documentation on their main page HERE.


-

Pablo ES
-
Cancel
-
Vote Up
0
Vote Down
-
-
Sign in to reply
-
More
-
Cancel
Comment-

Pablo ES
-
Cancel
-
Vote Up
0
Vote Down
-
-
Sign in to reply
-
More
-
Cancel
Children