

In Release 2023 R2, there are new menu items under Development as shown on the screen shot below.
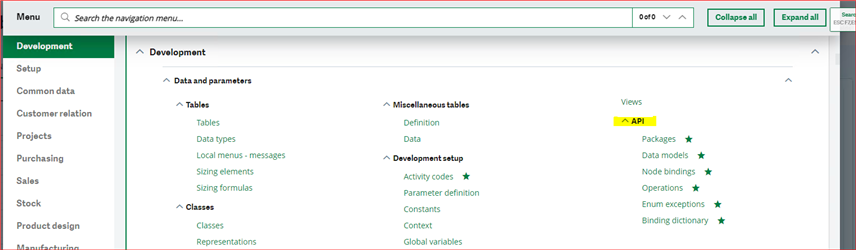
These functions are part of the new Sage X3 Extensibility technology which will allow sage Business Partners and Customers to customize the X3 GraphQL API.
It is currently under closed Beta testing and is planned for release in the next scheduled X3 release, which should be the first half of 2024.
This is an exciting development for usability and accessibility of X3 to sage X3 customers.
It will be possible to add custom fields to the existing Data Models, so that the information stored in these fields can be retried using GraphQL queries.
Mutations, the ability to modify data in the database, will also be customizable, through custom Subprograms.
I will give brief overview of these functions.
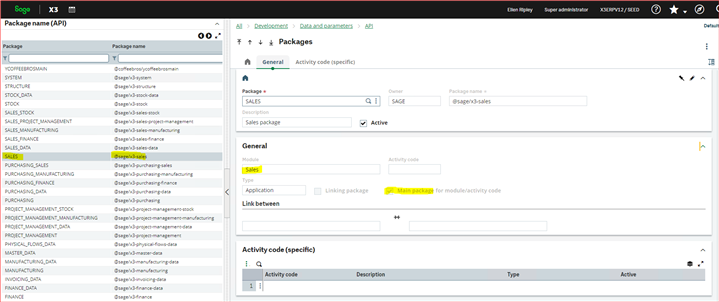
Packages(GESAPACK)
This defines the GraphQL Packages for extensions. The X3 standard API packages are not modifiable
Below is the standard sage Sales Package.
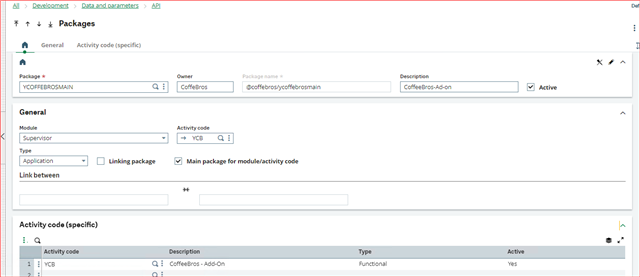
Below is an example of a custom Package. The custom Package name COFFEEBROS is derived from the customer's company, Coffee Brothers Company.
The custom Package only extends a standard Package but does not modify the standard Package
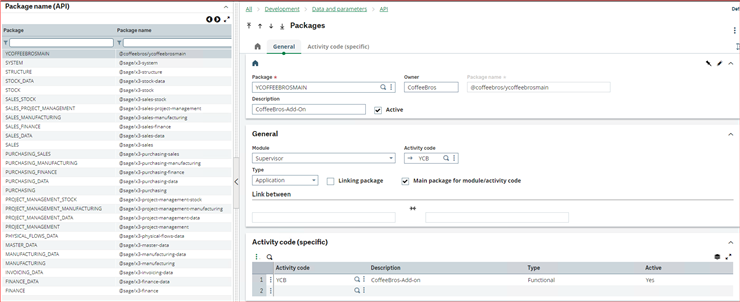
The Activity code is recommemded for custom packages.
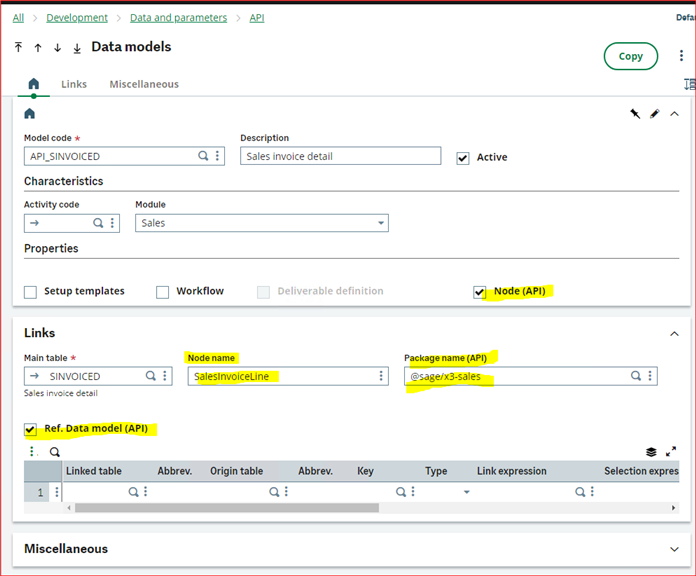
Data Model (GESAWM)
The Data Model function is an extended version of the X3 Data Model function that provides a description/definition of the GraphQL nodes.
Below is an example for the SalesInvoiceLine node with the new GraphQL API fields on the Data Model highlighted. The source of the data and links between tables is defined
in the Data Model. This is then used during the node generation to construct the Graph API structure.
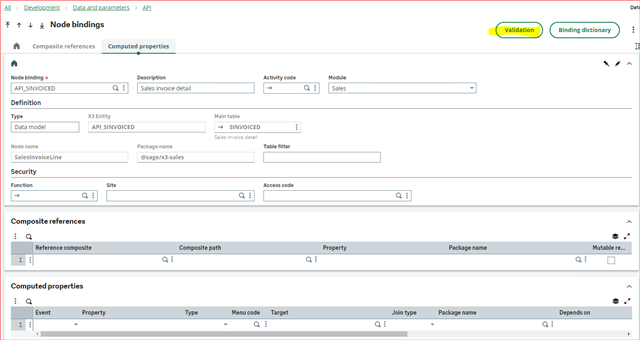
Node Bindings (GESANODEB)
This is where the link between the Package and the Data Models is done through validation as highlighted. This step is crucial before the node generation.
Node generation follows after this node binding validation. Node generation is done in VS Code which requires a Development Pack currently in closed Beta testing (not available to partners and clients)
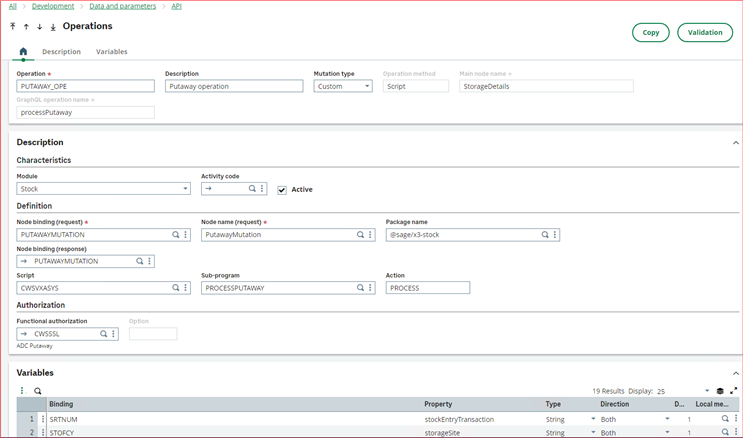
Operations (GESAPIOPE)
This function allows the creation of custom mutations. The Package and Main Node is specified in the Operation function. Currently it works through X3 Subprograms. This is a similar process as done when creating subprograms used in web services.The Subprogram parameters must be specified in the Variables section.
The variable names in GraphQL must be camelCase. e.g. PutawayMutation
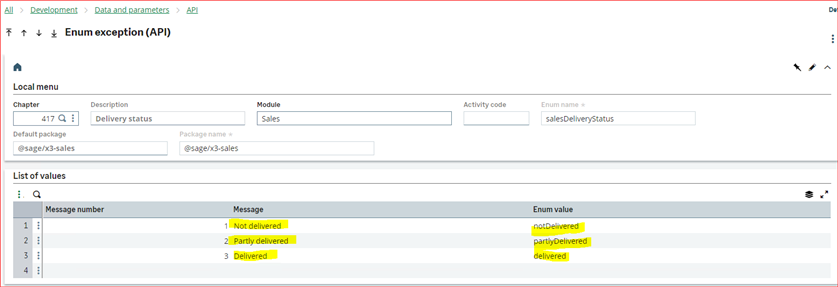
Enum exception (GESAENUMB)
This function is used for converting existing X3 descriptions into GraphQL friendly format, so-called camelCase. The definition for camelCase is a compound word that uses capital letters to delineate words. It does NOT include the first letter of the word. e.g. Not delivered becomes -- notDelivered. These GraphQL friendly formated values are used during the generation of Nodes.
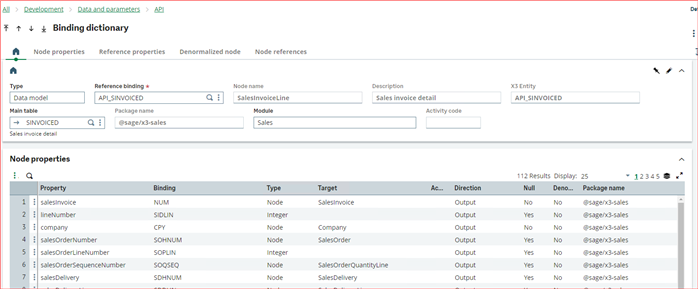
Binding Dictionary (GESAPINOD)
This function displays data generated during the Data Model validation. The structure of the Nodes in the Packages as well as their properties
Example of adding fields to a Data Model.
Suppose we need to add two custom fields in the X3 standard receipt screen and be able to access the data in these two custom fields via GraphQL API.
The fields are for "Delivery Rating", 20 in length and "Receipt notes", 50 in length. ( The length is needed in the Table and screen modification)
(1) First we create the Package in the Packages function(GESAPACK) Notice the owner, CoffeeBros.
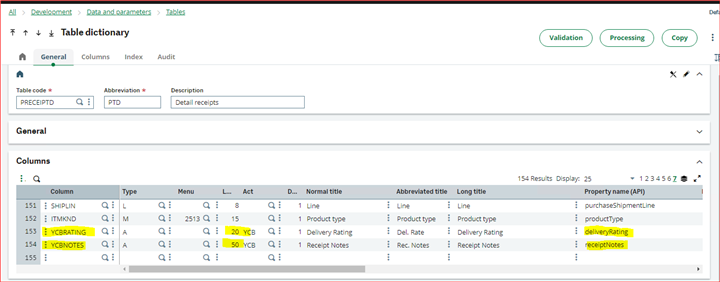
(2) Then, we must create the custom fields in the appropriate table and screen. We add the fields in the PRECEITED table and PTH1 screen. This is already familiar.
Notice the GraphQL API fields (Property name API) that have been added to standard screens. The property names are camelCase.
The table must be validated.
Screen PTH1
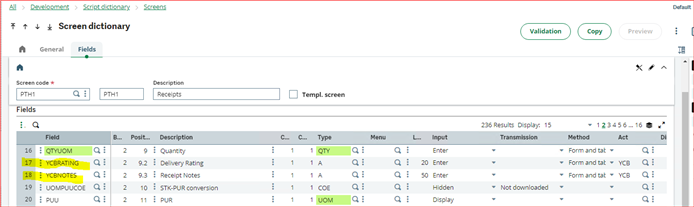
The screen and entry transaction must be validated via the function GENMSKTRT

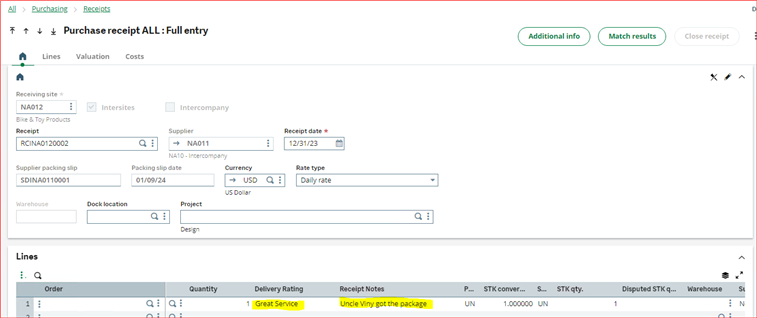
(3) Then in the receipt function, we can see our custom fields in the receipt line, and can enter some data in the fields as highlighted below.
(4) The next step is the Node binding function (GESANODEB). We simply launch the validation button. This will generate the different links between the GraphQL nodes and operations and make our custom fields accessible from GraphQL. This validates ALL records on that screen.
(5) We then generate the Package in Visual Studio by launching the command line npm run generate, at the Services Development Package root directory.
![]()
A new package will be generated under the Application directory.
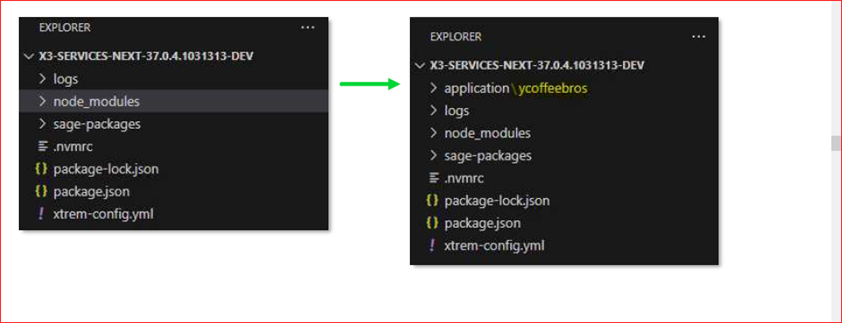
We change the directory to /application/[our package name] and build using the command npm run build

After building, we can test if things went according to plan by the command npm run start
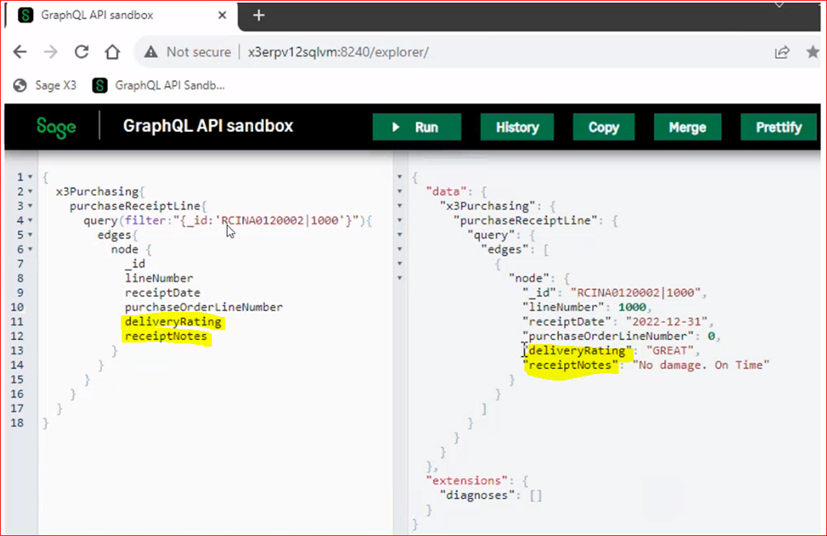
Then we can test on the GraphQL Sandbox at http://[server]:8240/explorer and see the custom fields now available in the GraphQL queries.
This API extensibility will be a great tool for Partner enablement in meeting customer demands, and there is more to come.

